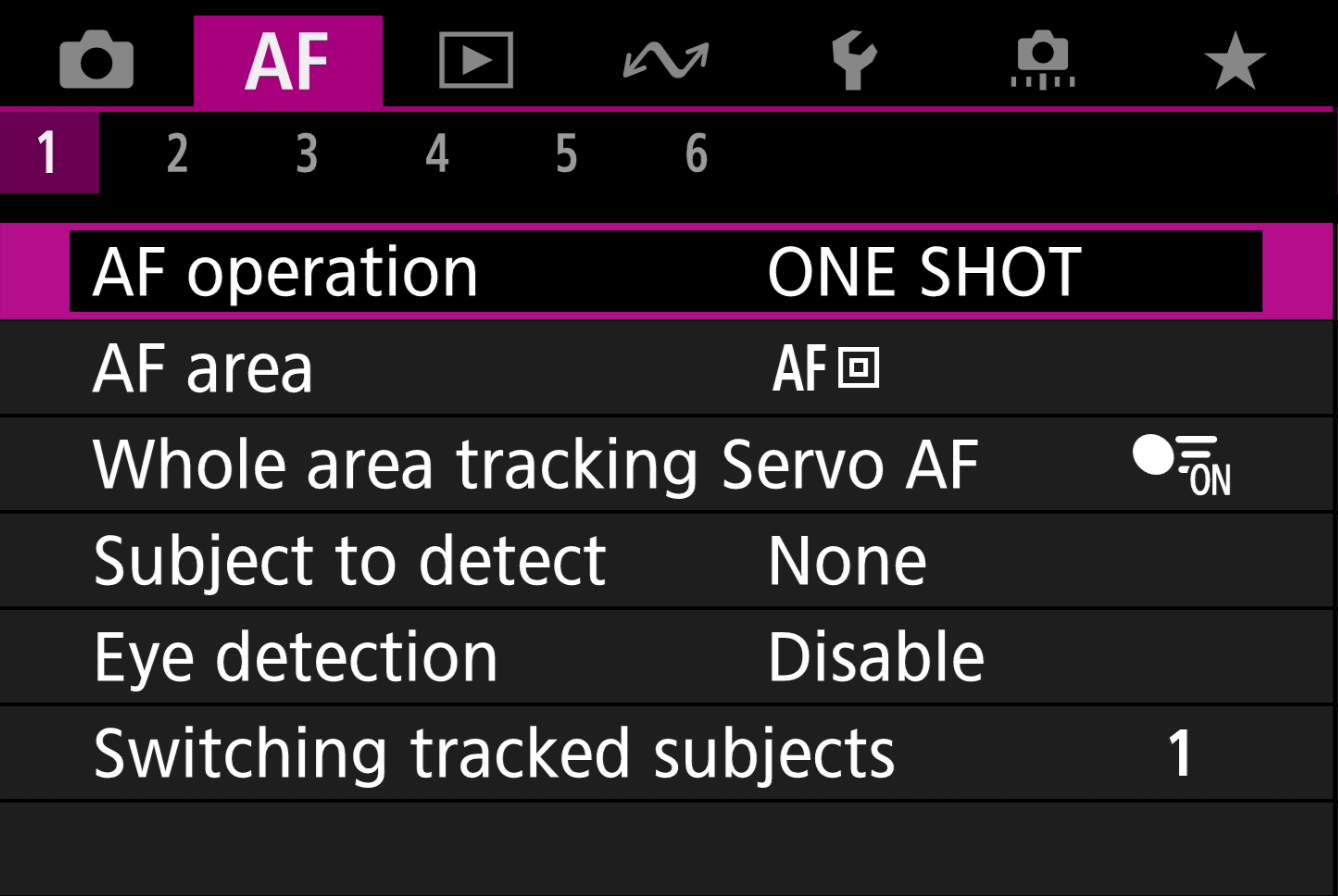
Jasper's R6 Mark II Autofocus Config
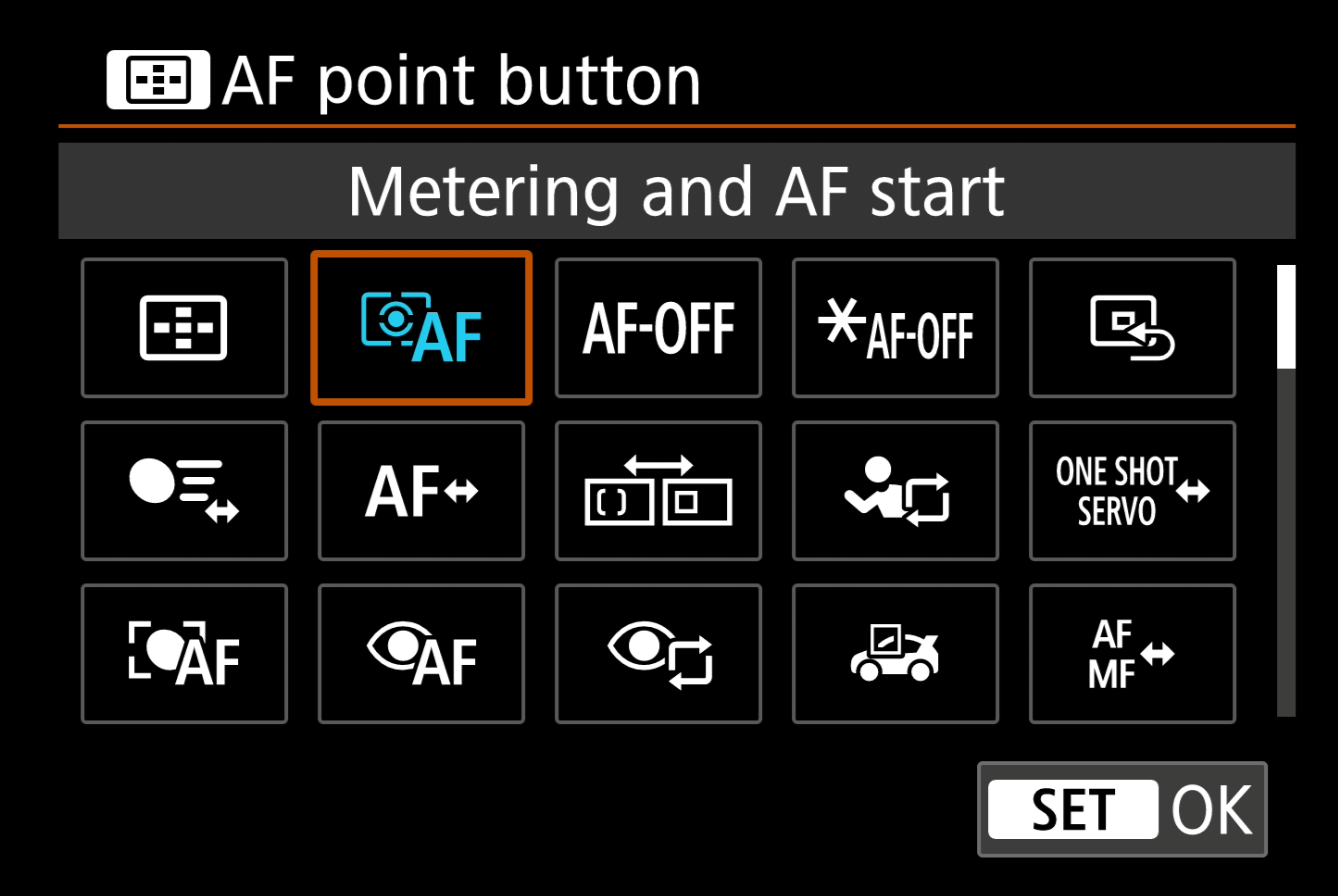
I have my camera setup with triple back button autofocus, one button for Eye detection and subject detection (AF-ON button), one for object detection (AE Lock button) and finally a "dumb" single shot spot autofocus (AF point button).
With this configuration, I'm able to go from tracking someone's eye, to a ball in play, to very specific spot with three different buttons for each, I have had this configuration for the last year shooting, events, sports, wildlife and portraits.
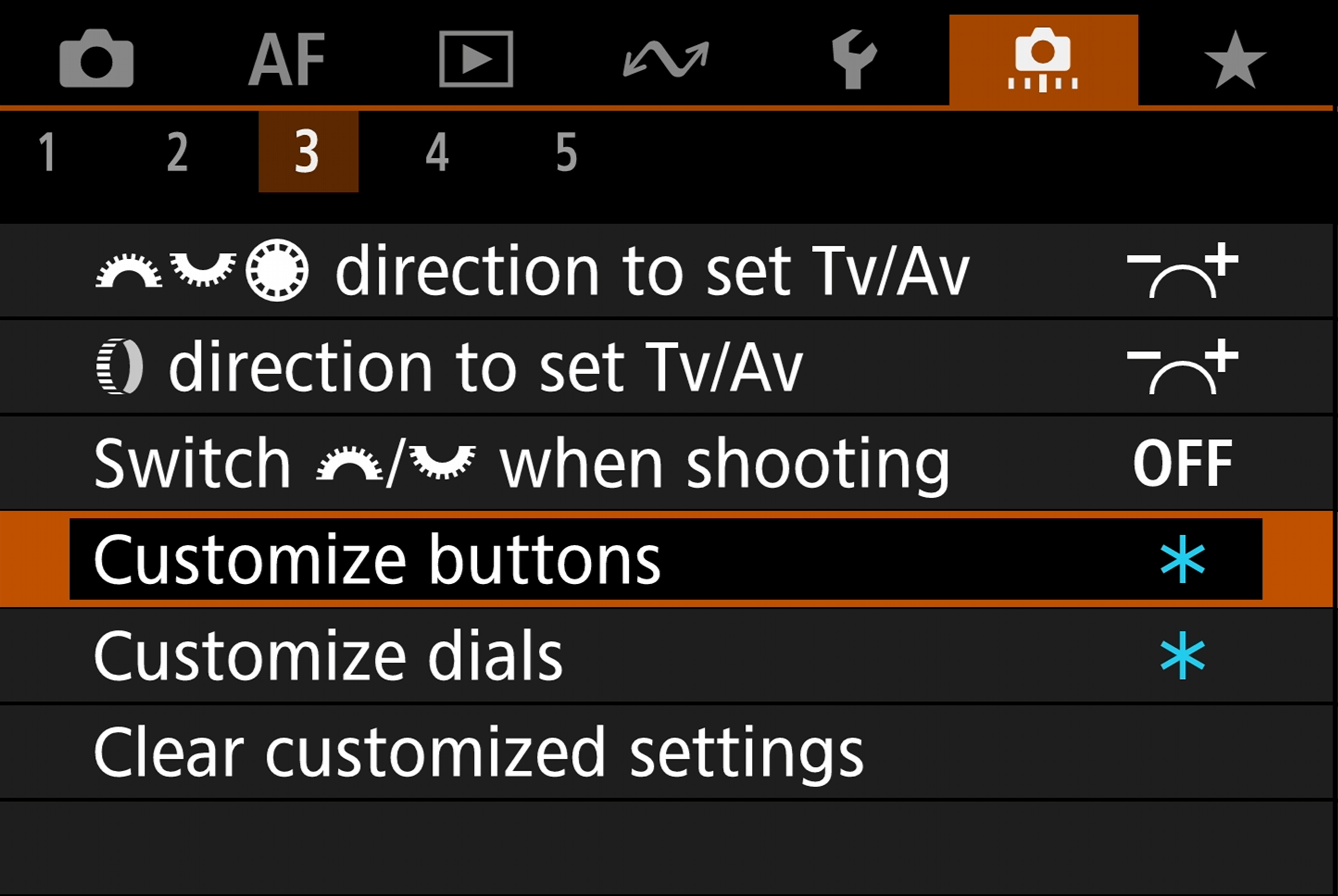
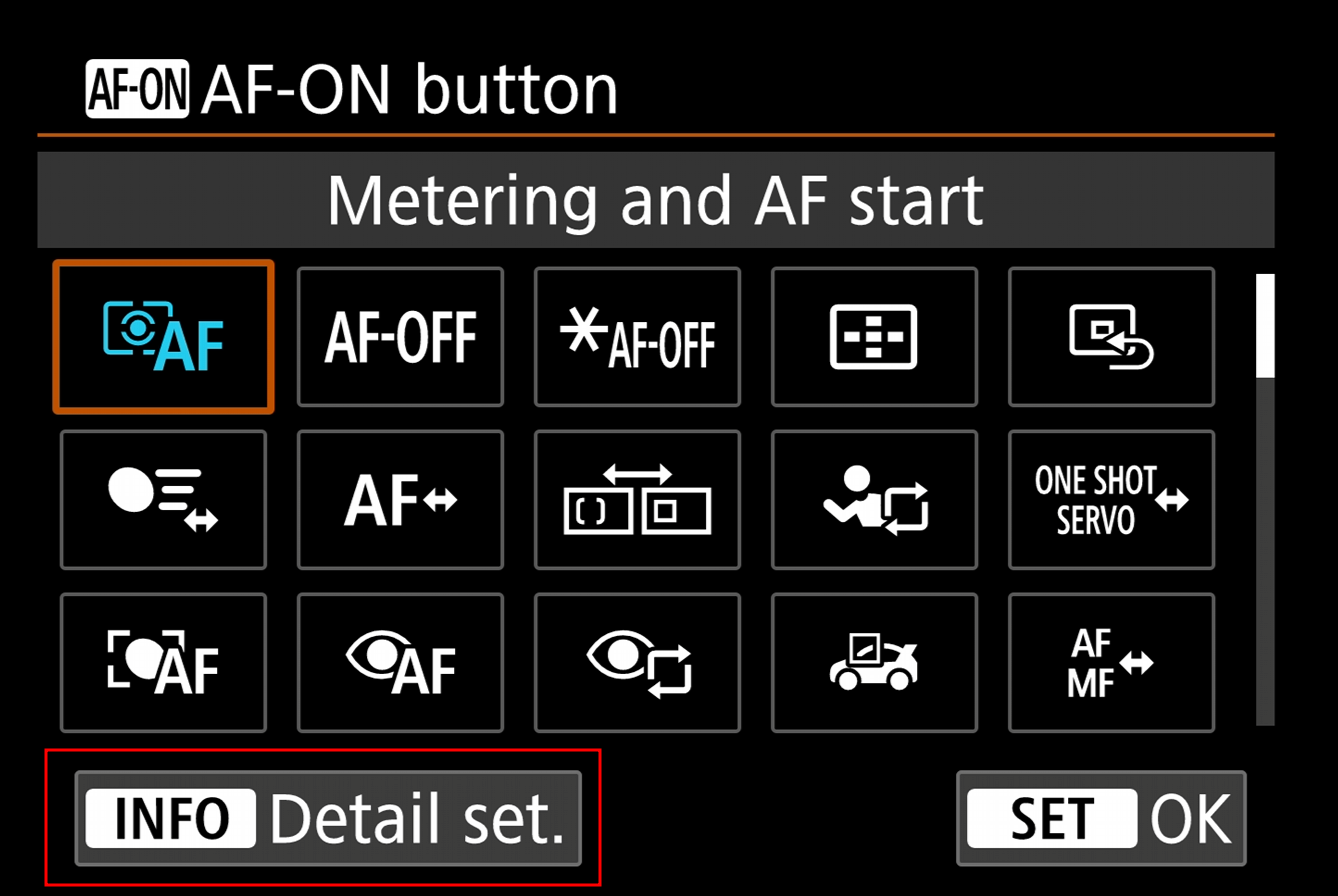
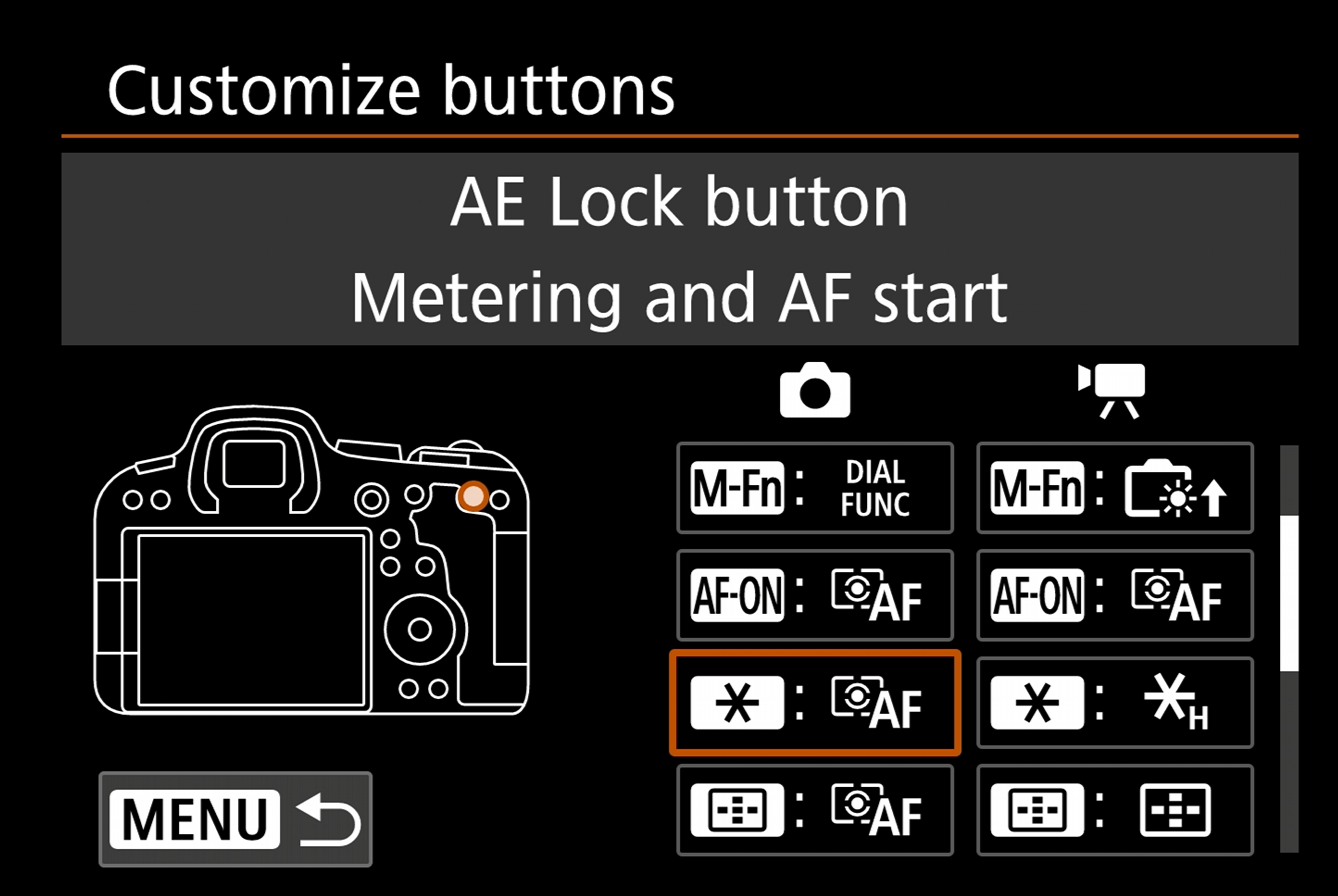
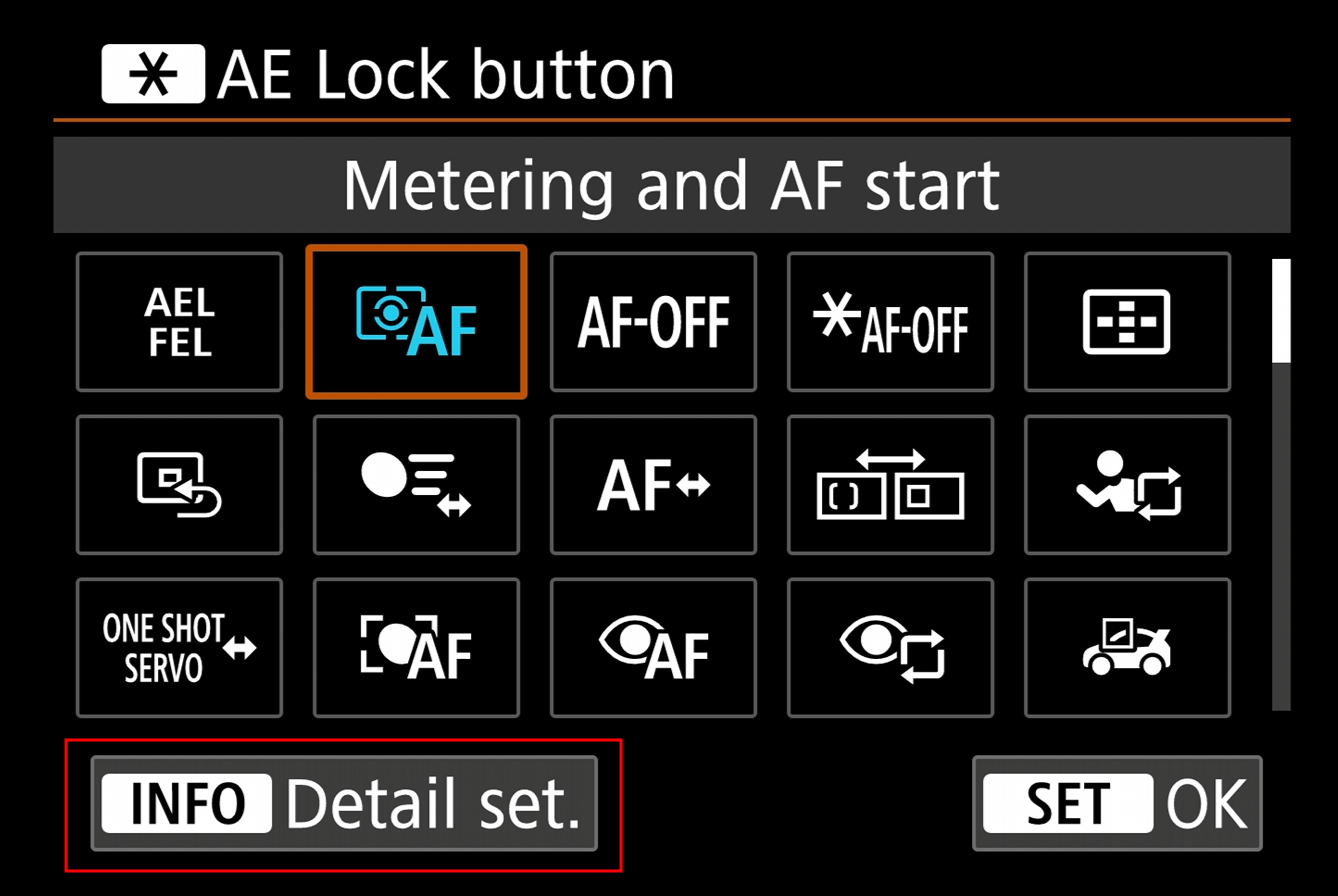
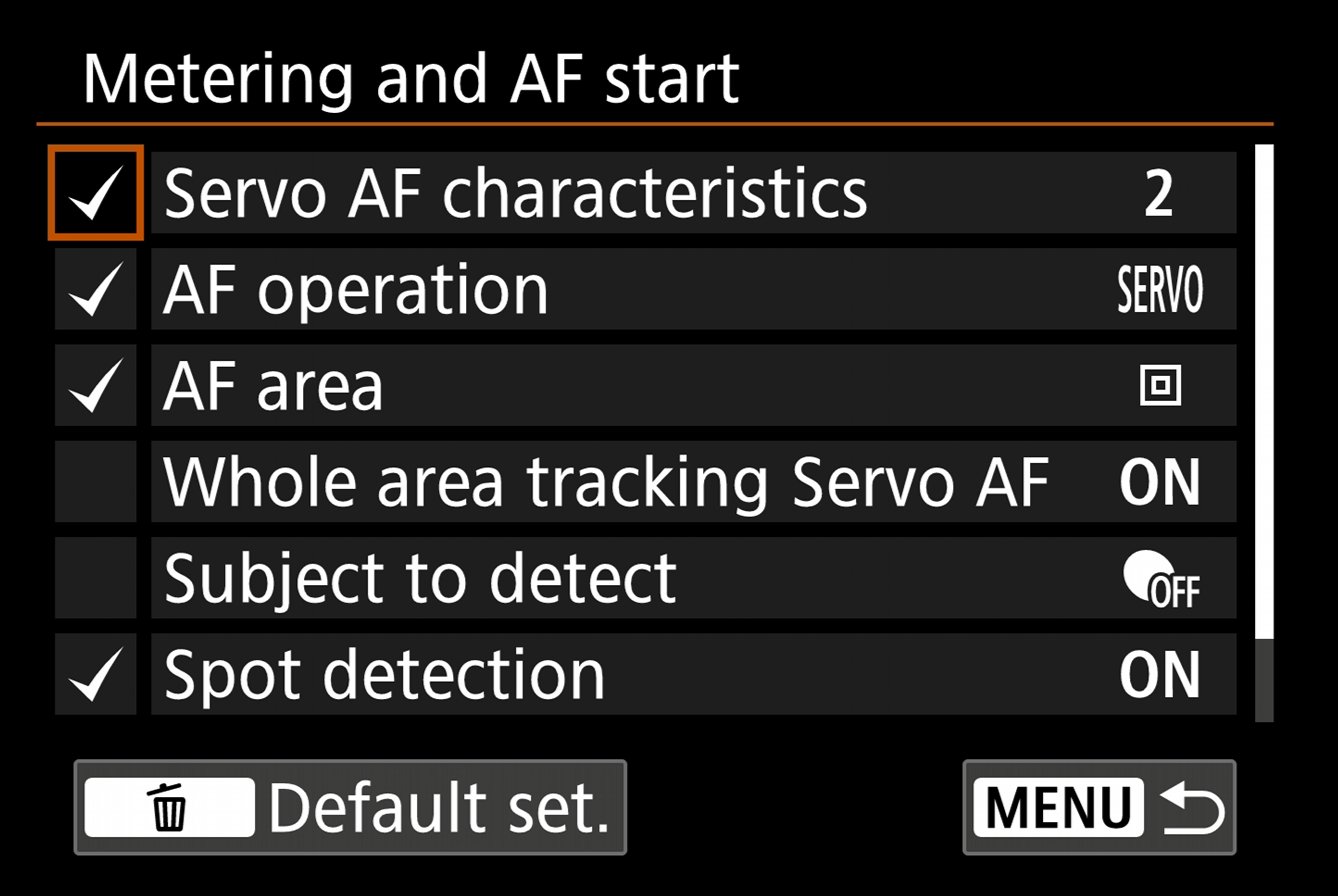
Normally, this isn't really possible due to not all buttons having the ability to be configured, but by utilising the ability to configure the "AF-ON button" and "AE Lock button" to "Metering and AF start", using the "Info Detail set." to further make specific adjustments and the "AE Lock button" utilising the options in PINK menu 1.
Please see the below screenshots for the full configuration:
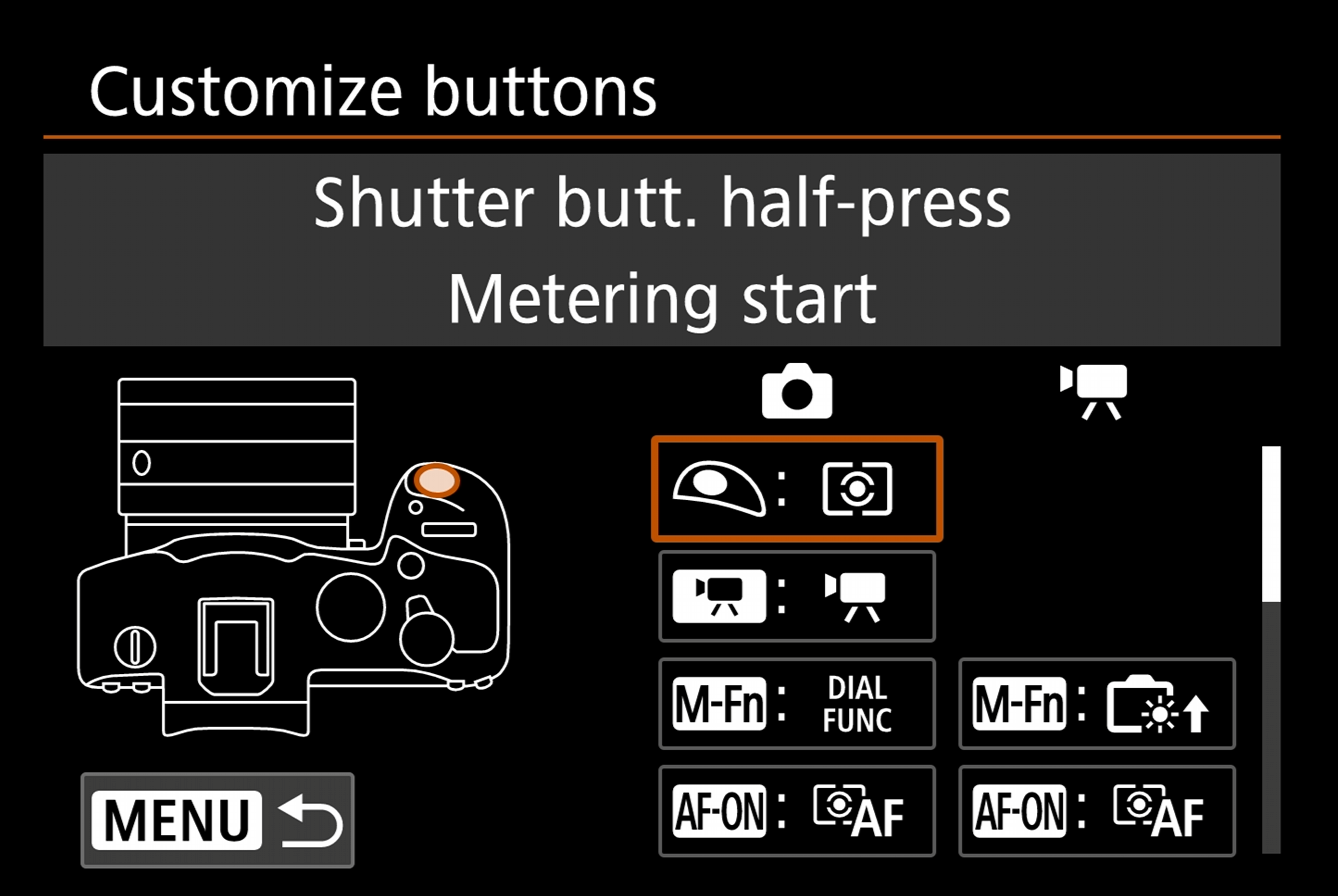
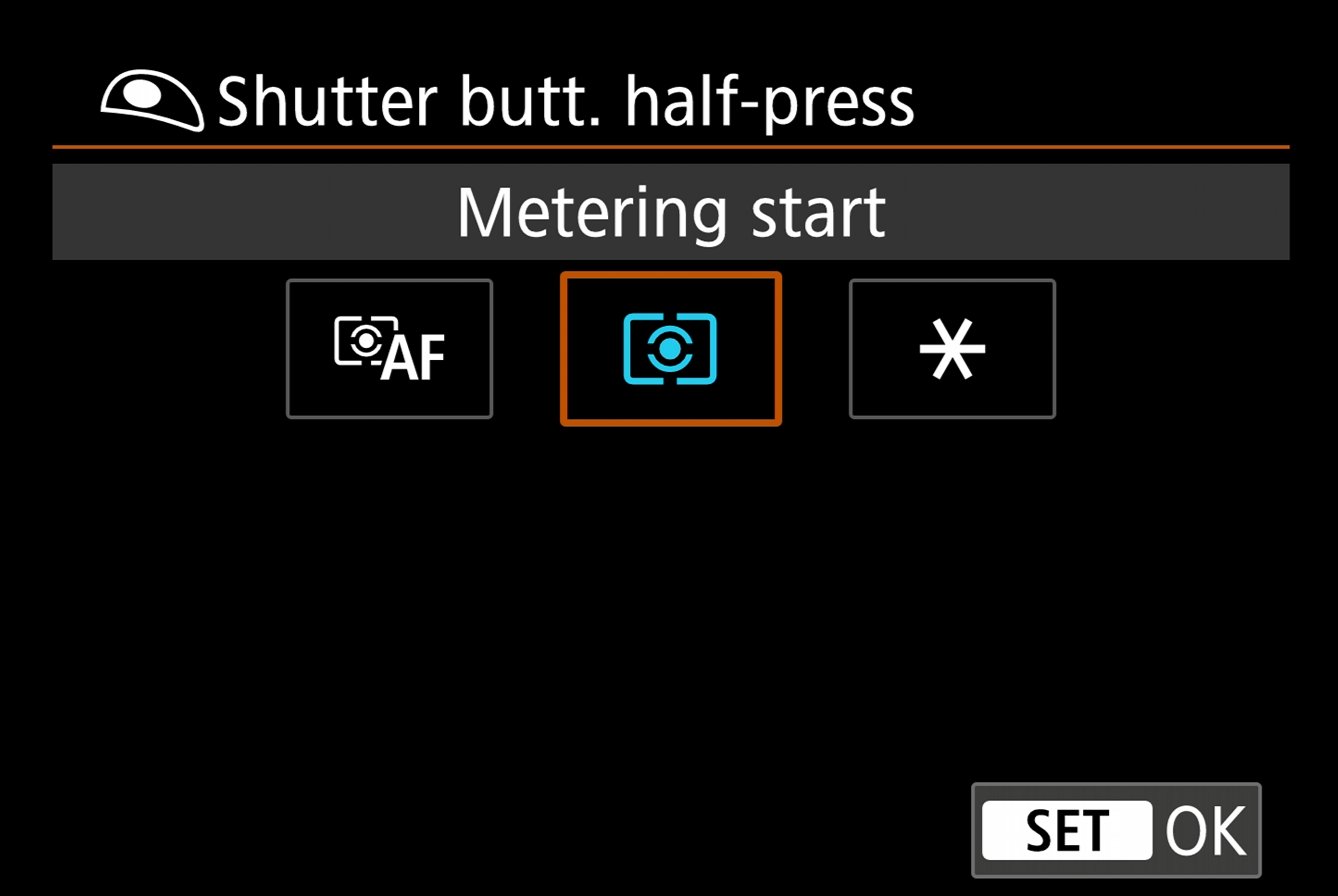
Shutter button:
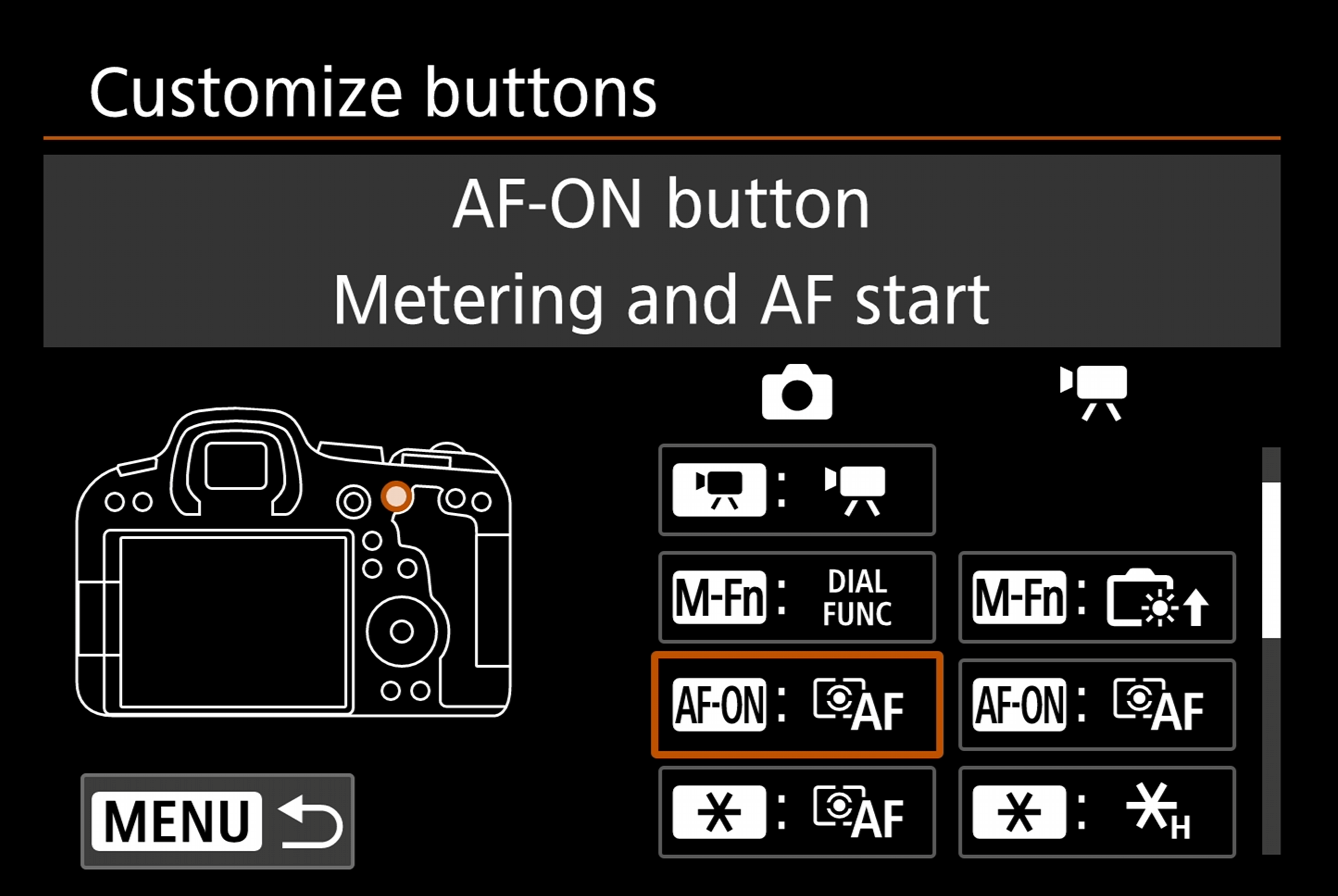
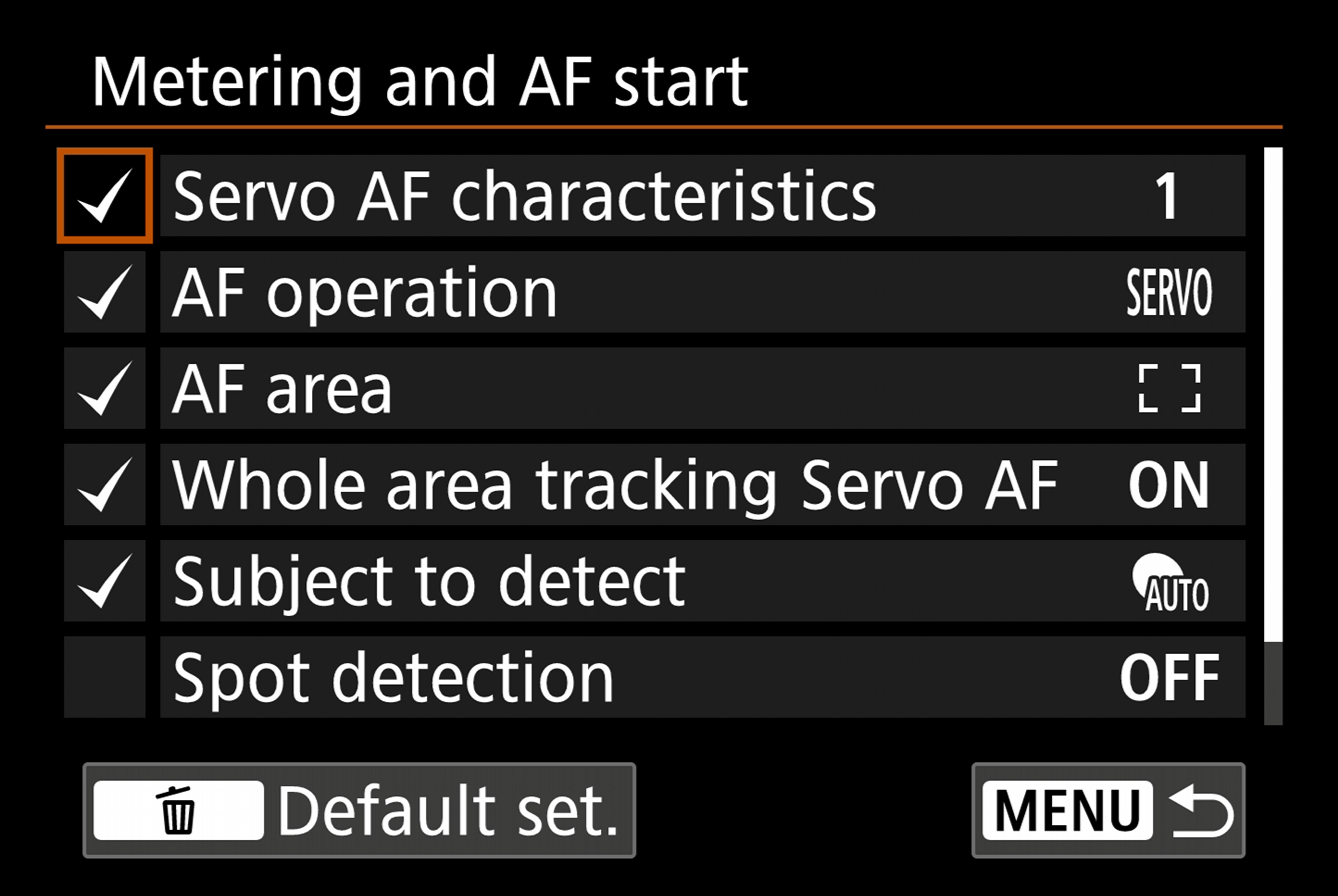
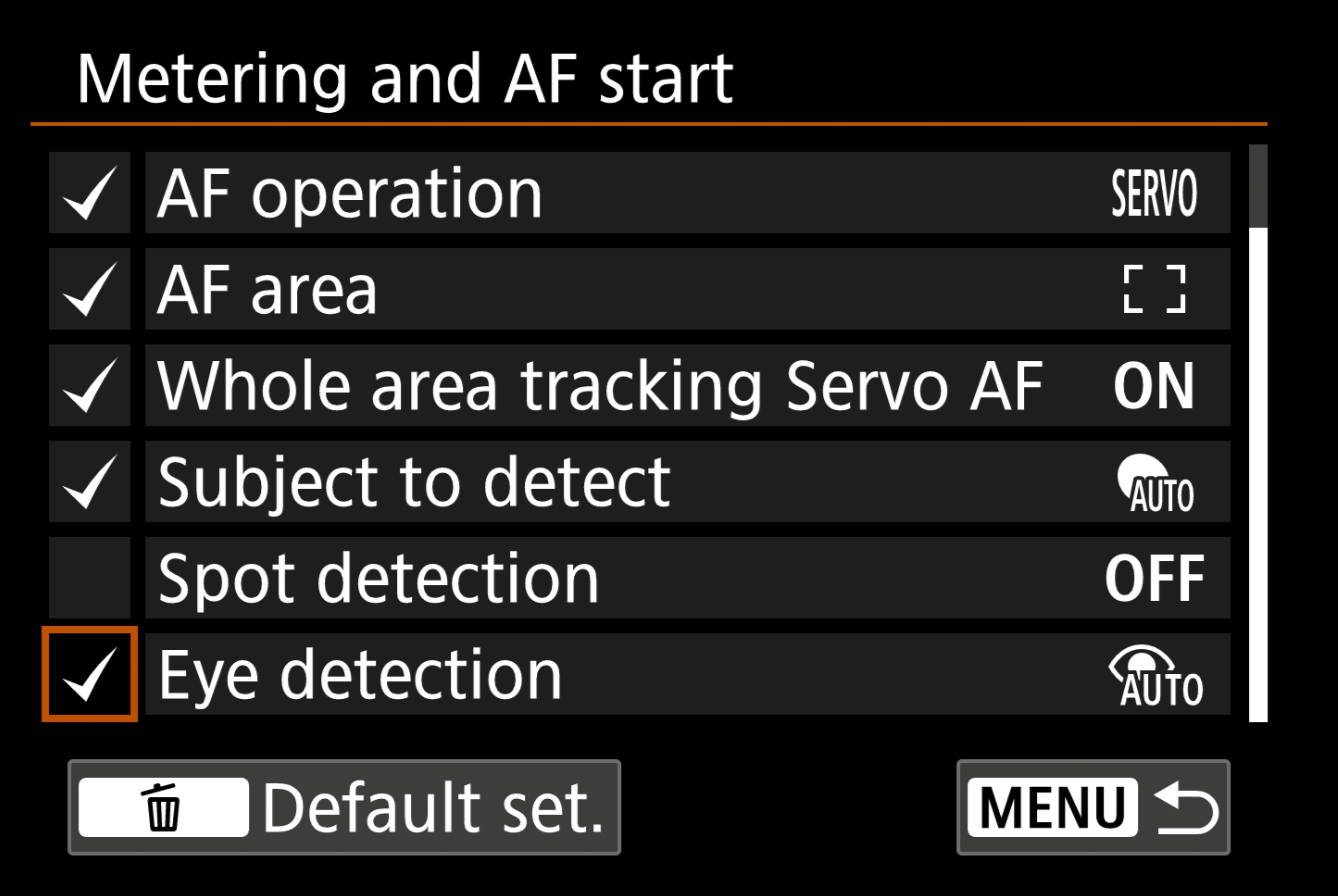
AF-ON button:
AE Lock Button:
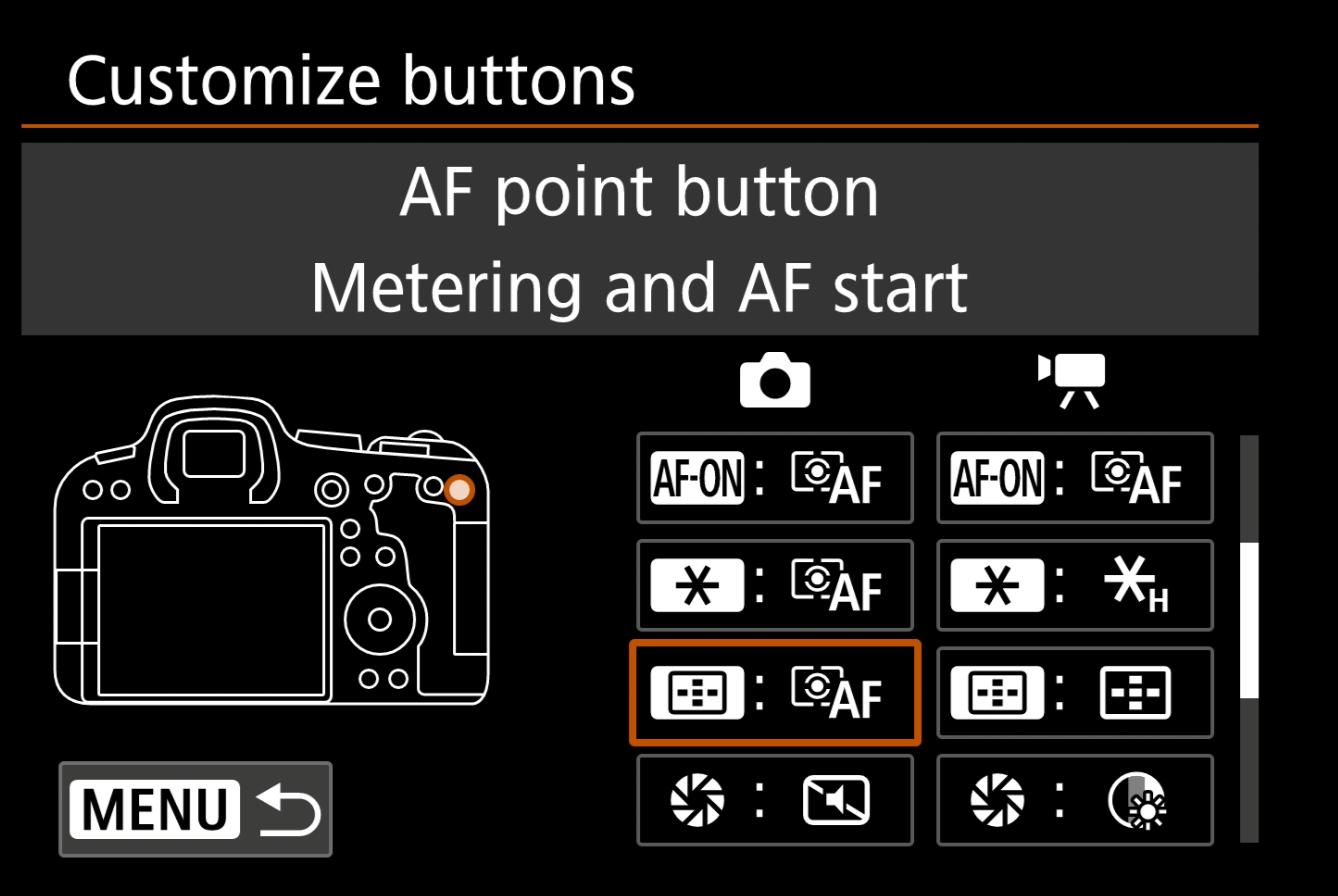
AF point button:
Multi-function button:
In addition to this, I have the "Multi-function button" set as below:
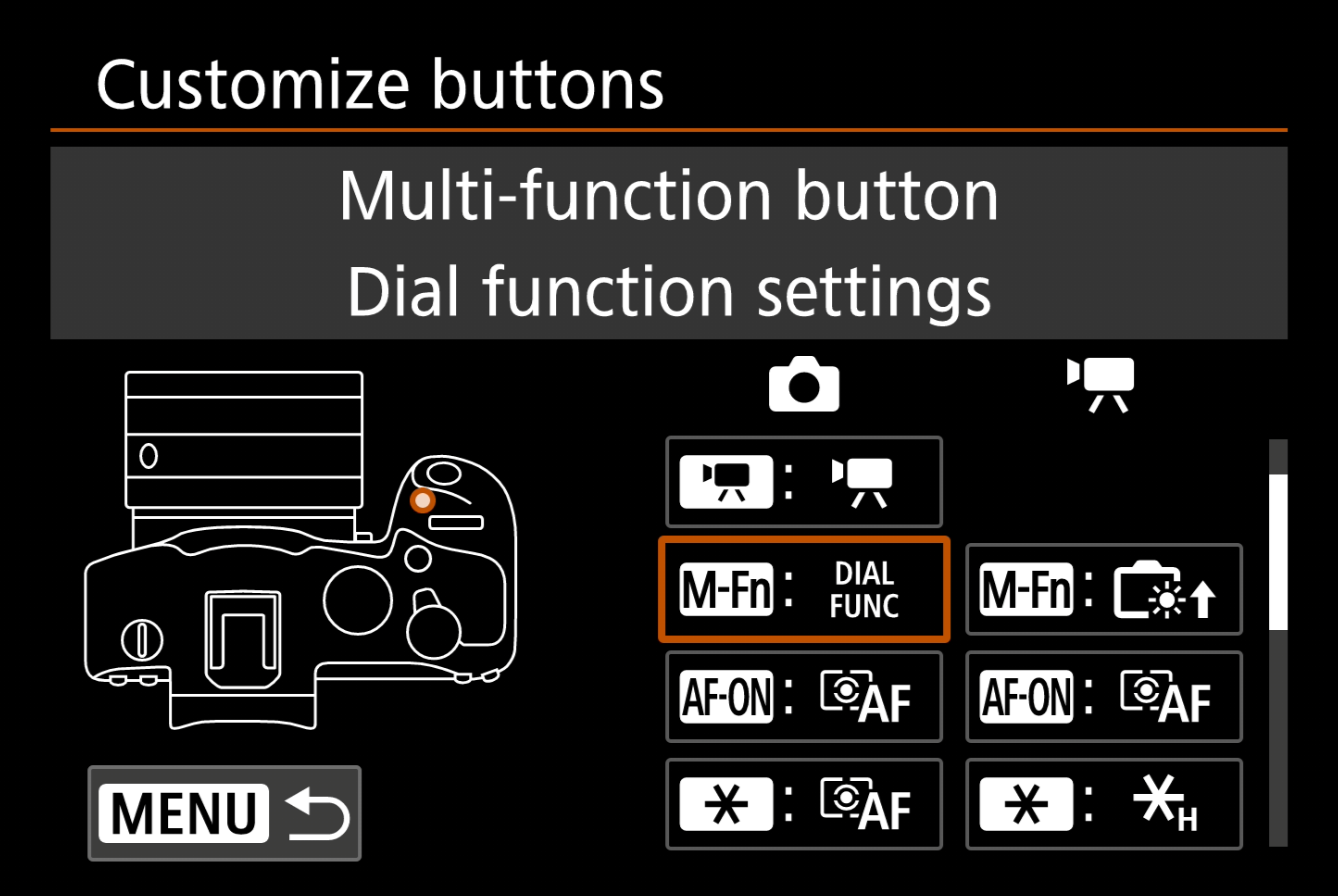
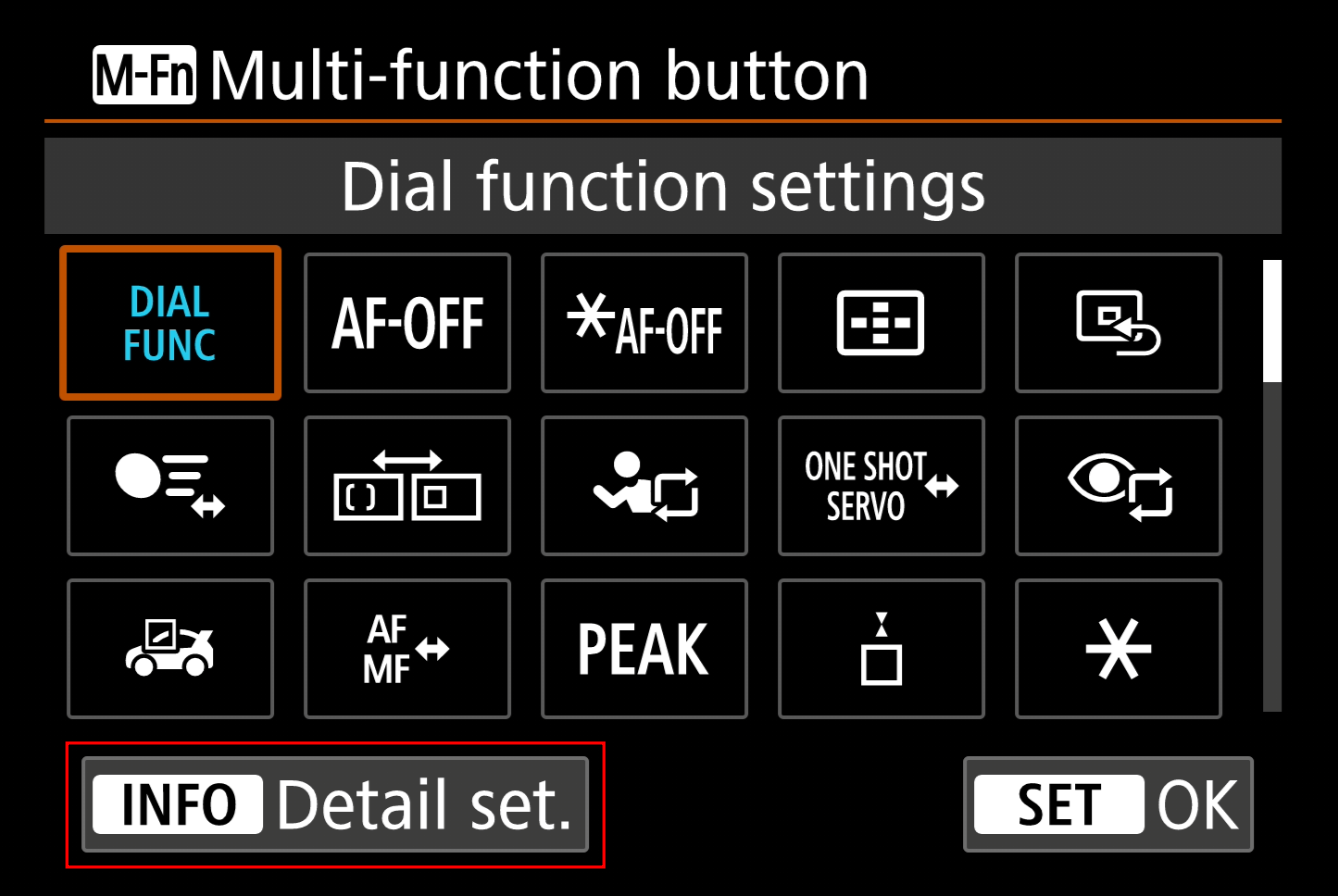
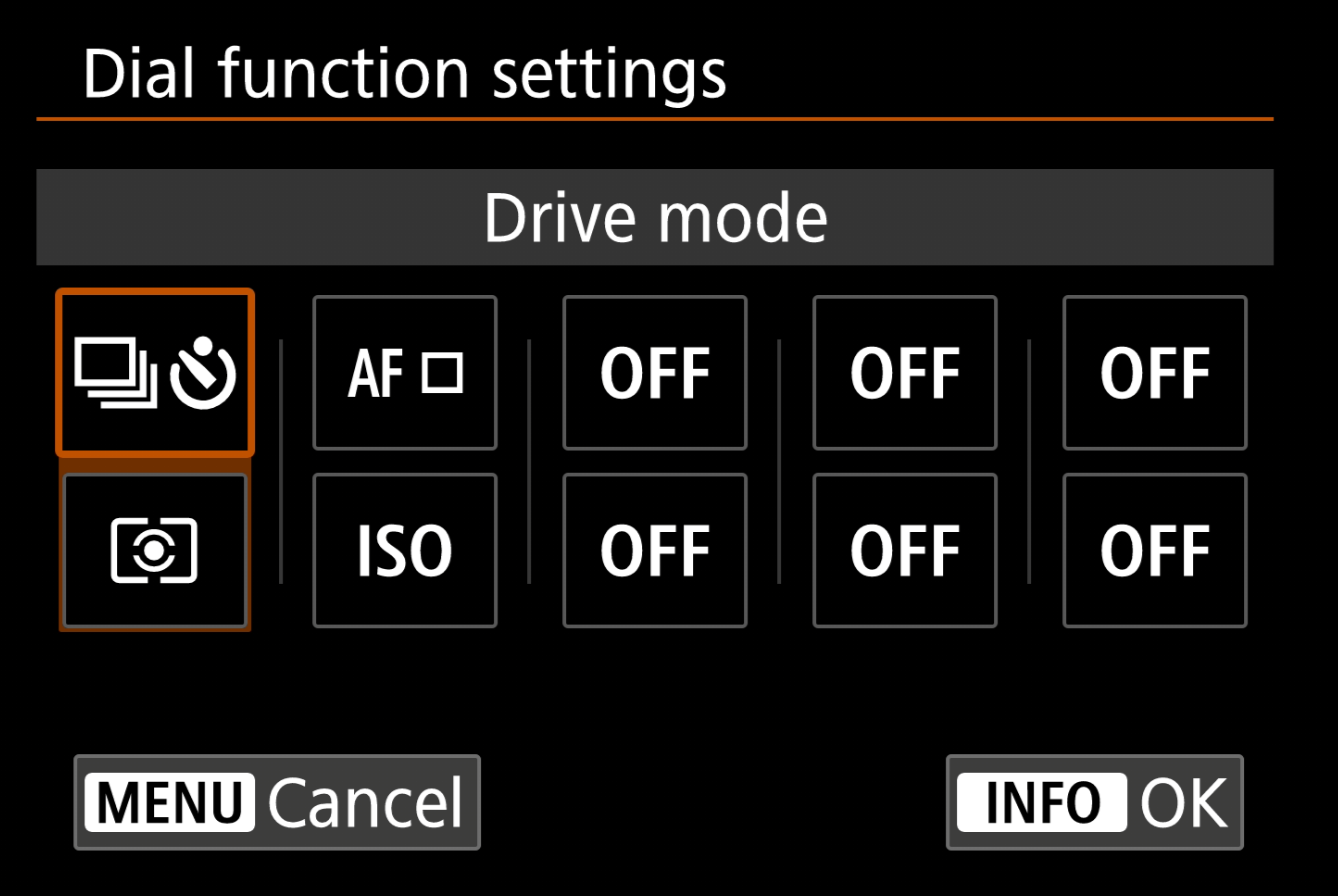
This allows quick changes of:
- "Drive mode", useful to access quickly to swap between timed shooting for tripod shots and normal speed shooting.
- "AF area", this will just be for the "AF point button", the dumb spot button. I have found this useful for situations where I was the spot bigger or smaller, bigger is better as you can be less accurate with where you place your spot.
- "Metering mode", just swapping between "Evaluative" and "Spot" metering, "Evaluative" being a good everyday option and "Spot" being useful for shooting subjects with a bright light behind them.
- "ISO speed", this is just for switching back to auto ISO quickly.
I think that's pretty much everything for the configuration, although, there's a lot more that can be changed and tweaked.
Servo AF Cases:
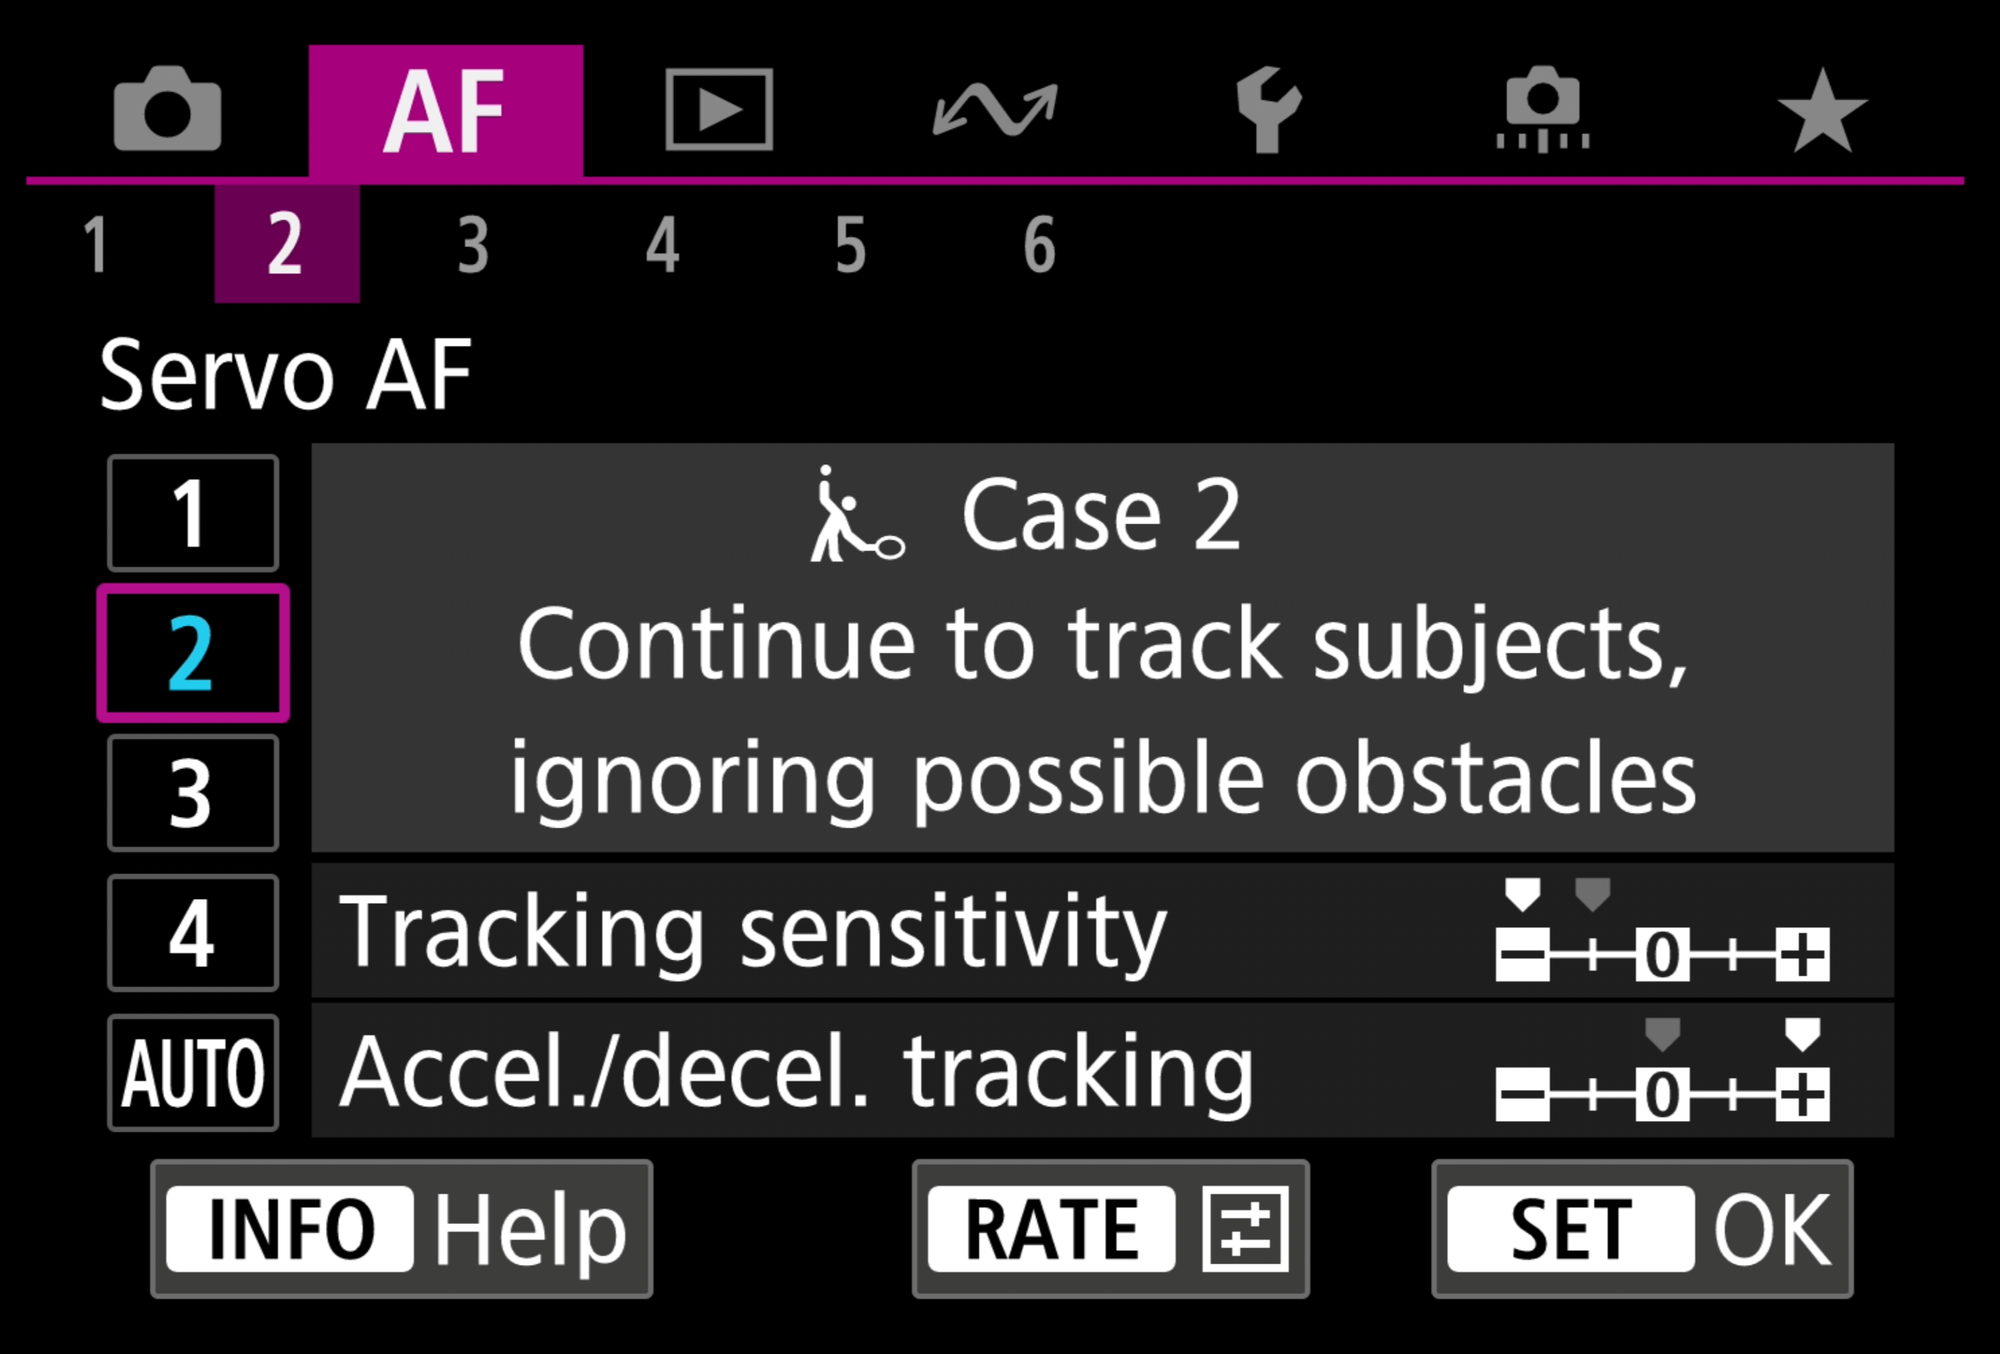
As we used different "Servo AF Cases" for the "AF-ON" and "AE Lock" buttons, "Case 1" and "Case 2" respectively, we can customise the cases for those buttons further to fine tune how they behave.
First, head to "PINK 2" and you'll have a list of all of the Cases available, from here you can customise their behaviour.
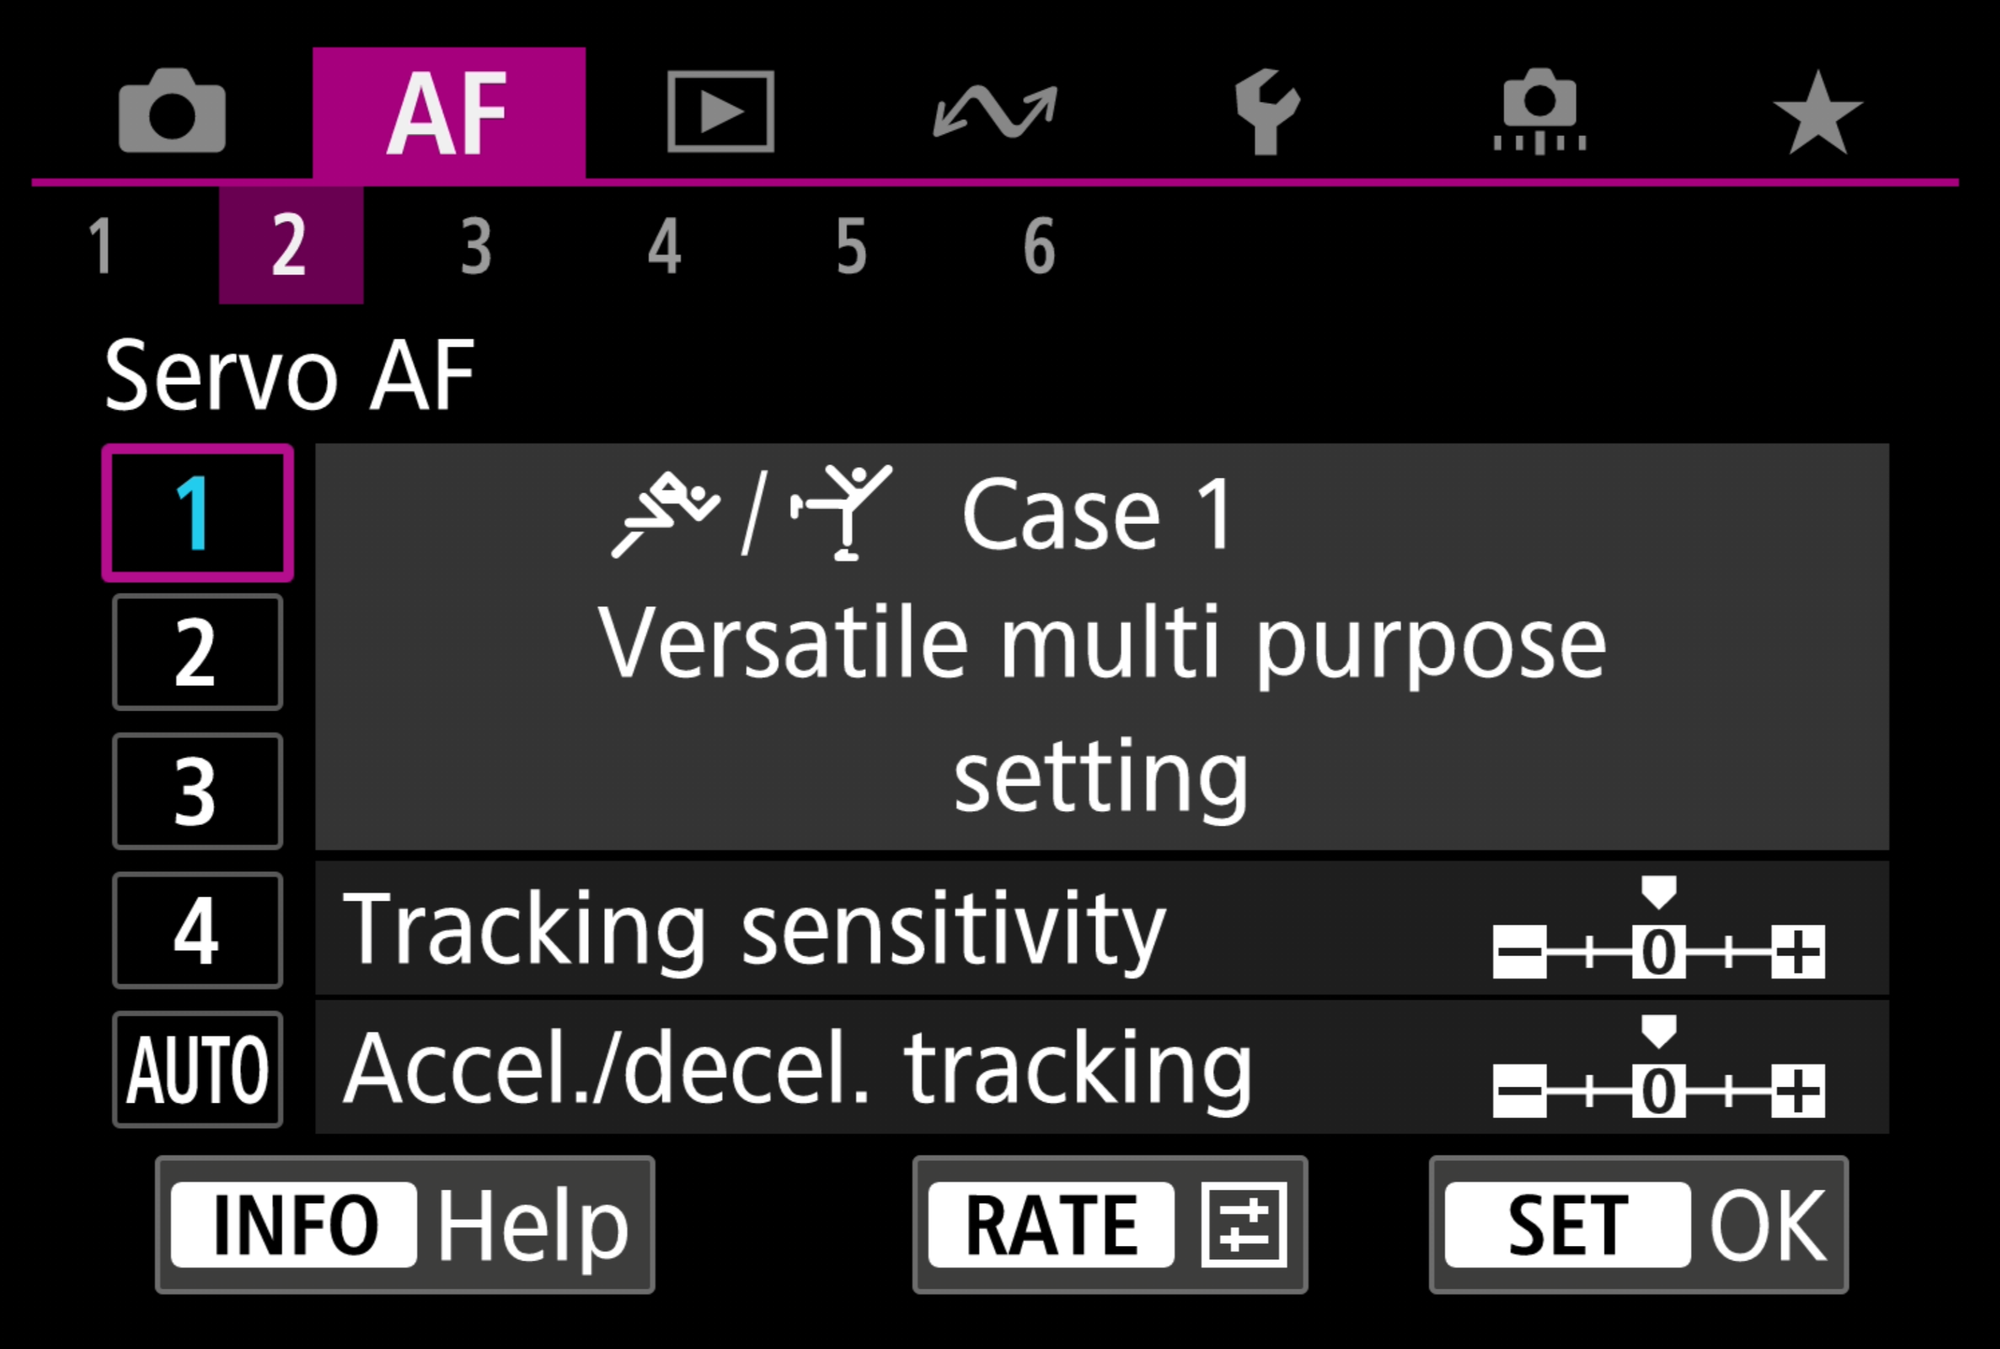
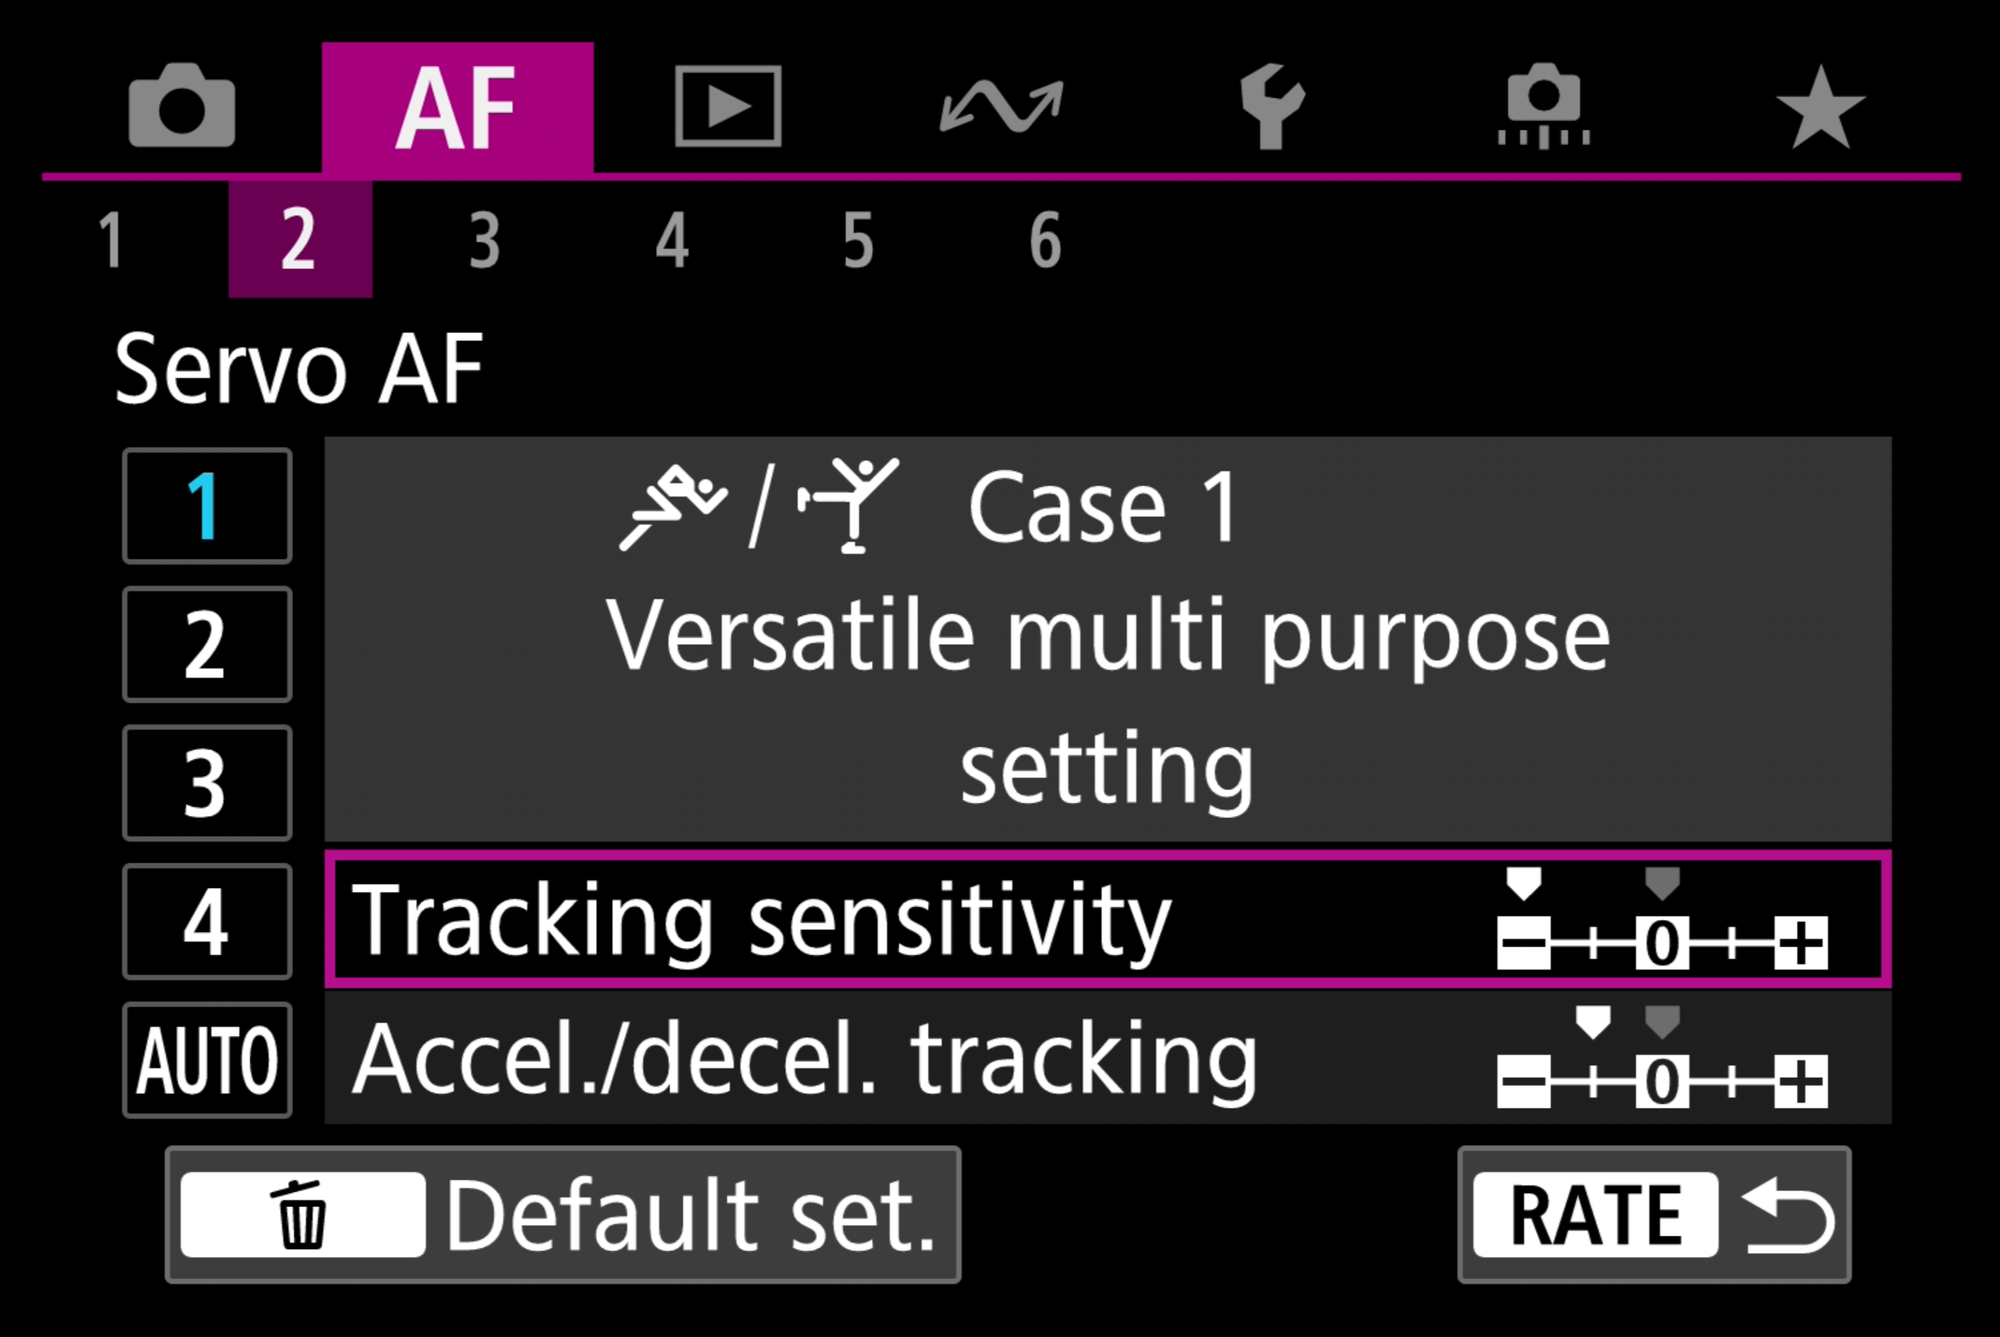
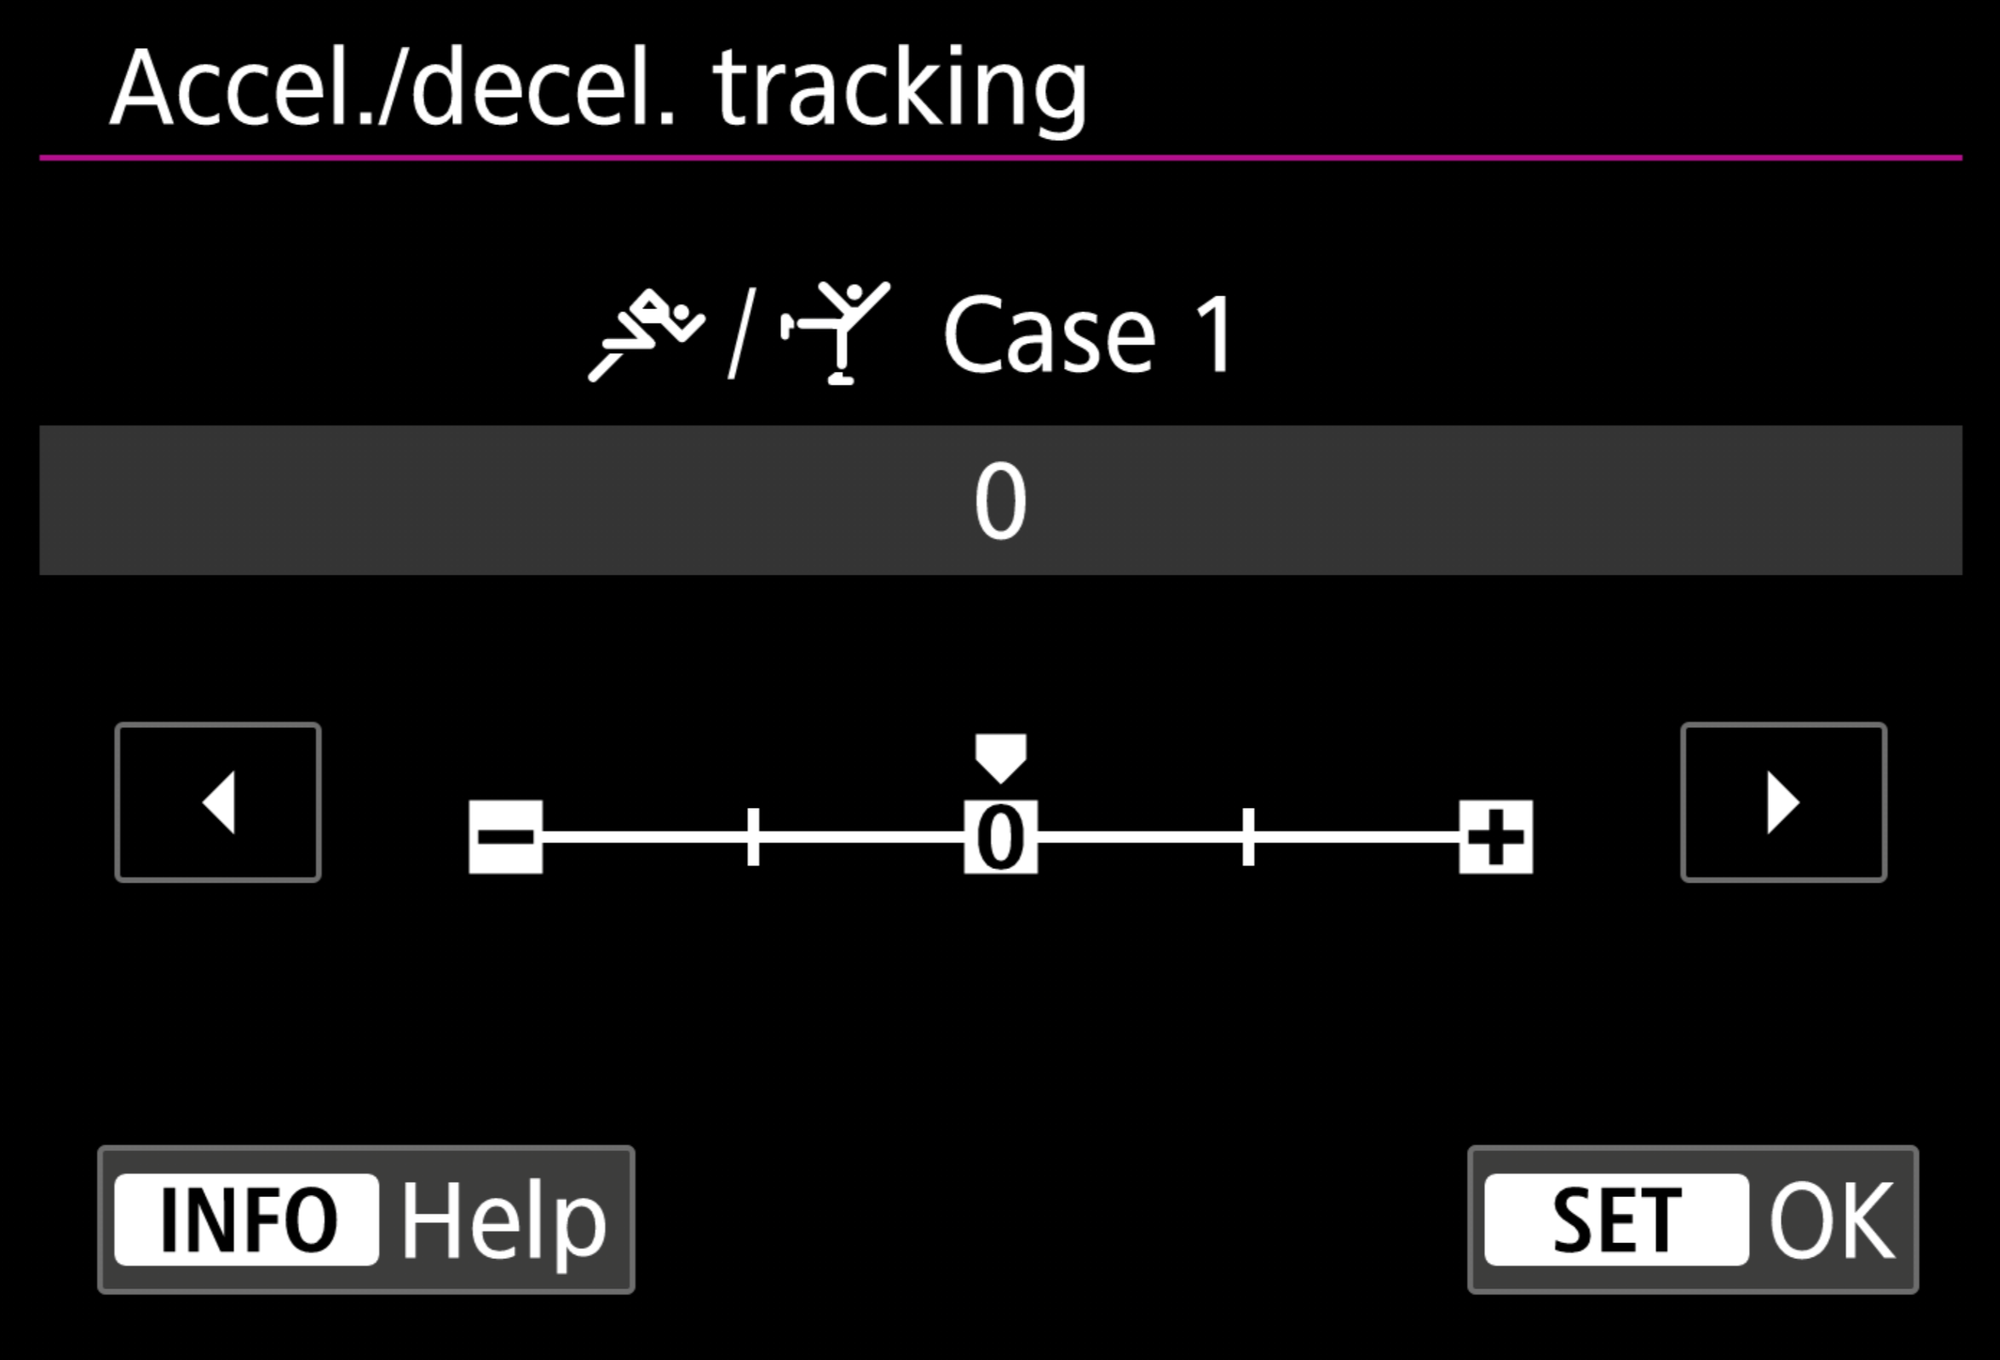
Pressing the "RATE" button on either "Tracking sensitivity" or "Accel./decel. tracking" allows you to change their behaviour.
Breakdown of "Tracking sensitivity" and "Accel./decel. tracking":
While either option is selected, if "SET" is pressed, the below menus will appear, from here, you can press "INFO" to bring up a detailed explanation of the settings:
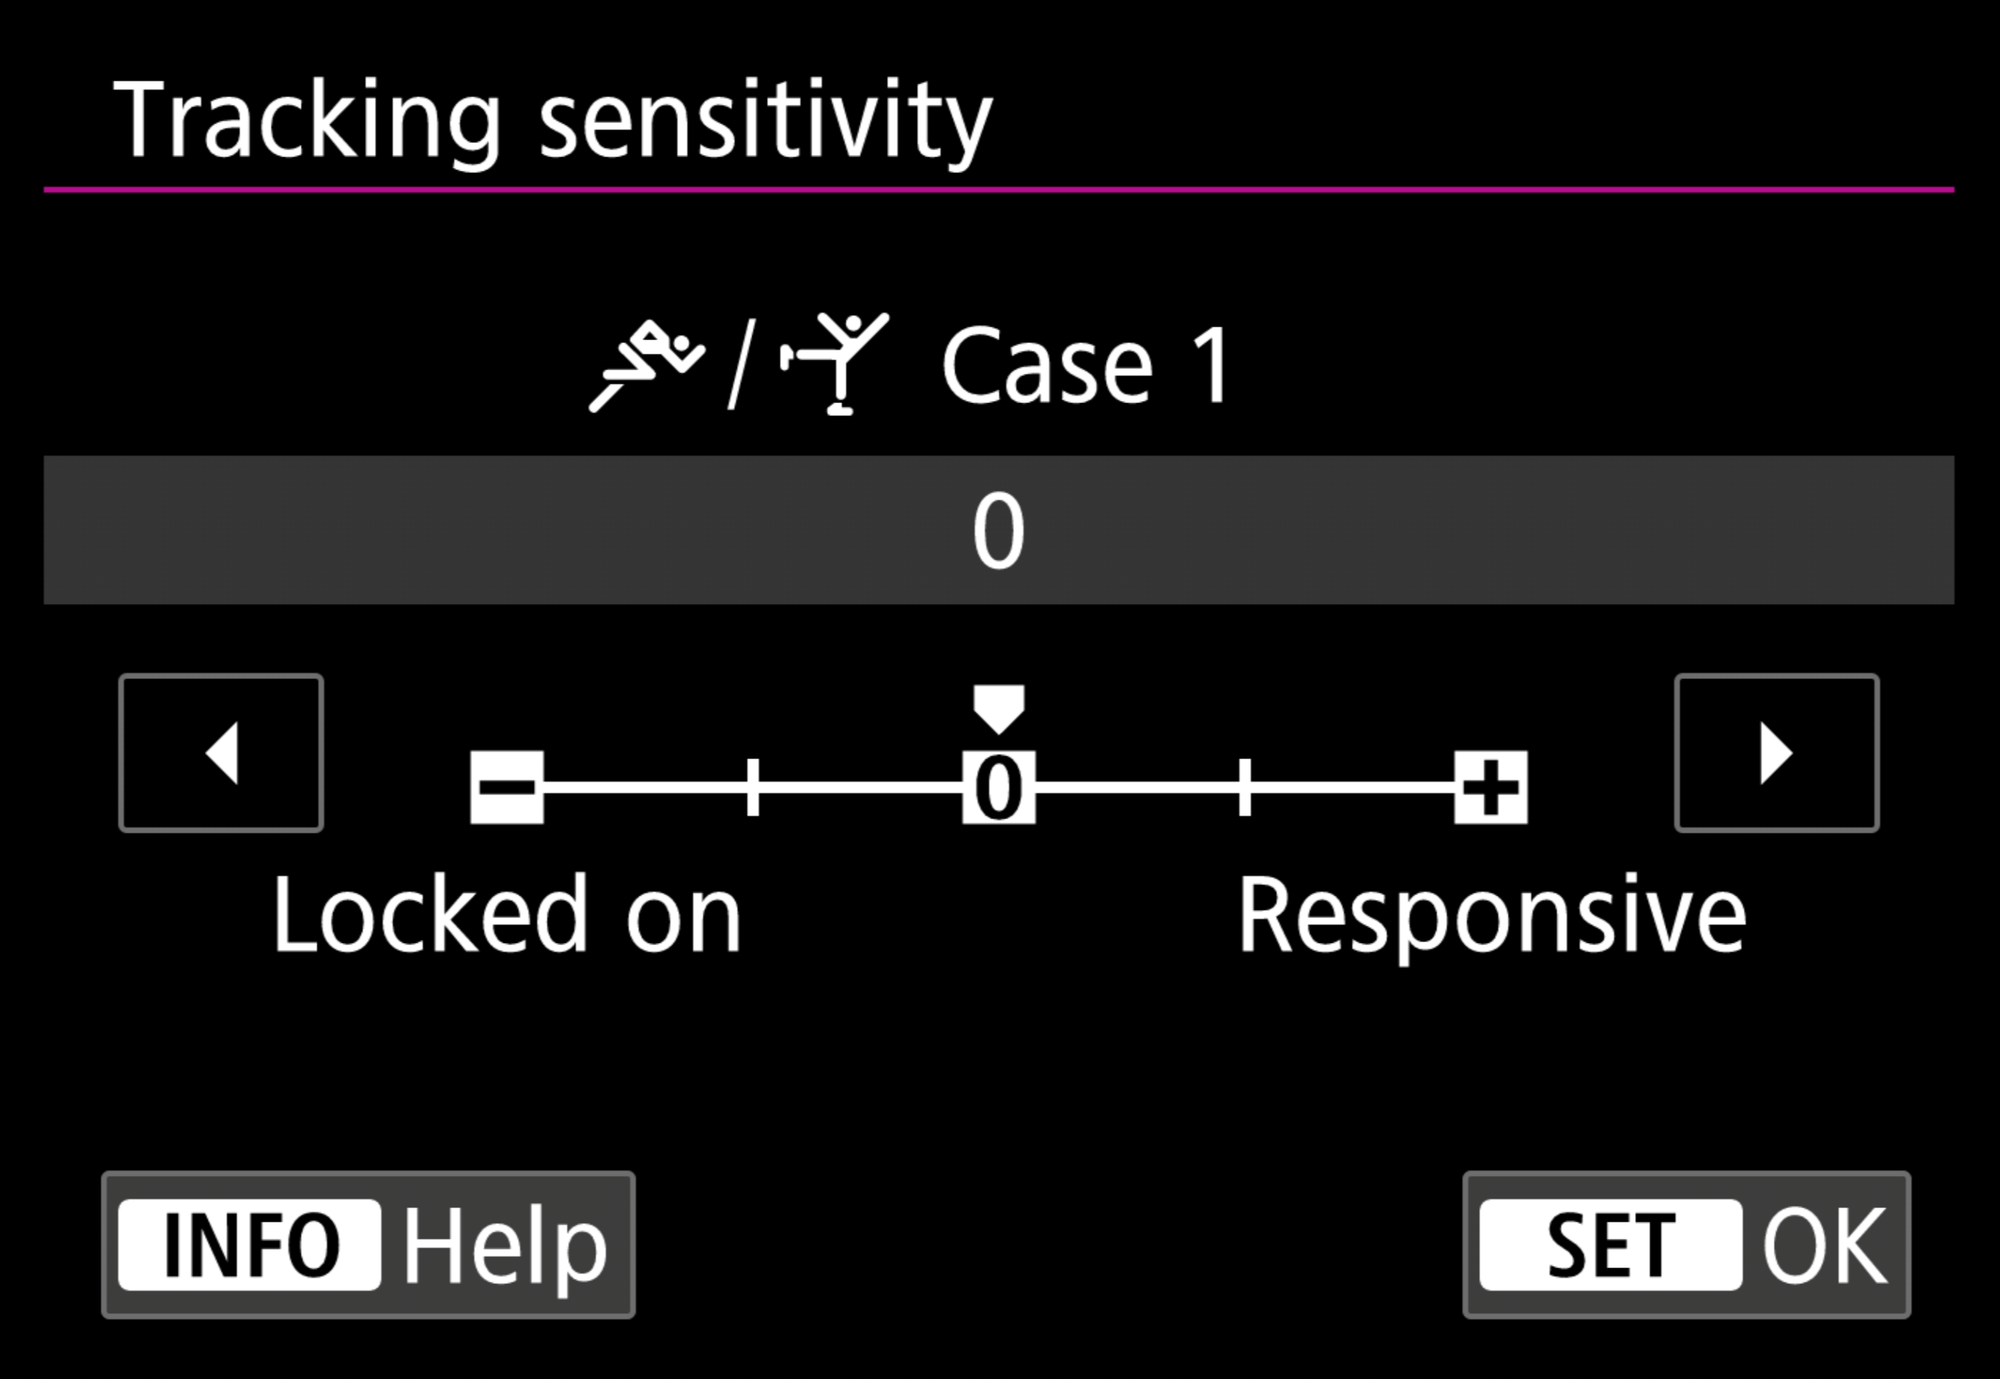
Change the AF response when subjects in focus move away from the AF points in Servo AF mode.
From the Canon INFO page:
- "- [minus] value: Keep subjects in focus, even if they exit the AF points. Ideal for continuing to track and keep a subject in focus. The lower the value, the longer the same subject is tracked, if it leaves the AF point.
- + [plus] value: Switch the focus to any new subjects that are detected by AF points. Ideal for switching the focus immediately to new subjects that enter AF points. The higher the value, the faster focus is acquired on a new subject."
From the Canon INFO page:
"Change the Servo AF tracking response to subject acceleration, deceleration, or stopping.
- With 0 [zero), stable focus can be achieved for subjects that do not suddenly accelerate or decelerate.
- +1 and +2 are suitable for subjects that move suddenly, accelerate, decelerate, or stop. The higher the value, the more closely erratic subjects are tracked. Note that focus may be inconsistent for subjects that move at a relatively constant speed.
- -1 and -2 are suitable for subjects that move at a relatively constant speed and when focus is inconsistent even when 0 [zero] is set."
By changing the Case settings to the above, I have found the autofocus to be more sticky and predictable in real world situations, as I have "Case 1" set on the "AF-ON" button, which I generally use for portraits and relatively slow subjects, whereas, "AE Lock" is for more high speed and erratic subjects.
Please feel free to adjust these and see what difference this makes for your style of photography!